Maintaining your vehicle involves various critical tasks, one of which is the replacement of the timing belt. This vital component plays a key role in synchronizing the crankshaft and camshaft, ensuring that your engine runs smoothly and efficiently. Neglecting the timing belt can lead to serious engine damage, making it essential for car owners to understand when and how to replace this important part.
In this guide, we will walk you through the necessary steps for a successful timing belt replacement. We will cover everything from the signs that indicate you need to replace your timing belt, to the tools required and the meticulous process to ensure a proper installation. Whether you are a seasoned mechanic or a DIY enthusiast, this comprehensive guide will equip you with the knowledge needed to tackle this critical maintenance task with confidence.
Understanding the importance of timely timing belt replacement can save you from costly repairs down the line. With this guide, you’ll learn the key factors involved in maintaining your car’s performance and reliability. Let’s delve into the world of timing belts and empower you to take charge of your vehicle’s maintenance.
Identifying Signs That Your Timing Belt Needs Replacement
One of the most critical components in your vehicle is the timing belt, and recognizing the signs that it may need replacement can save you from costly repairs. Early detection is key to preventing engine damage.
One significant indicator of a failing timing belt is unusual noises coming from the engine. A ticking or slapping sound may suggest that the belt is worn or loose, which can lead to misaligned components. This noise should prompt an immediate inspection.
Another sign to watch for is the appearance of visible wear on the timing belt itself. If you can access the belt, inspect for signs of cracking, fraying, or glazing. Any of these physical changes can indicate that the belt is nearing the end of its lifespan and requires replacement.
Additionally, if your engine misfires or runs poorly, this could be related to the timing belt. A malfunctioning belt can cause improper synchronization between the crankshaft and camshaft, leading to decreased engine performance. If you experience rough idling, it’s advisable to check the belt.
Furthermore, if you notice an oil leak around the front of the engine, it could signal that the timing belt’s seals are deteriorating. Oil contamination can weaken the belt, making replacement essential before a breakdown occurs.
Lastly, keep an eye on your vehicle’s service schedule. Most manufacturers recommend replacing the timing belt every 60,000 to 100,000 miles. Adhering to this guideline is crucial, even if you don’t immediately see other warning signs.
Step-by-Step Process for Replacing Your Car’s Timing Belt

Replacing the timing belt is a critical maintenance task that ensures your engine runs smoothly. Follow this step-by-step guide for a thorough and effective replacement.
Step 1: Gather Tools and Parts
Before starting the replacement, ensure you have all necessary tools: socket set, wrenches, torque wrench, timing belt kit (including the belt and tensioner), and any other manufacturer’s recommended parts.
Step 2: Prepare the Vehicle
Park your vehicle on a flat surface and engage the parking brake. Disconnect the battery to prevent any electrical issues during the replacement process.
Step 3: Remove Engine Covers
Remove any covers or accessories obstructing access to the timing belt. This often includes the front engine cover and potentially the crankshaft pulley.
Step 4: Align Timing Marks
Before removing the old timing belt, rotate the engine to align the timing marks on the camshaft and crankshaft. This step is crucial to maintain proper engine timing after the replacement.
Step 5: Remove the Old Timing Belt
Loosen the tensioner and carefully remove the old timing belt. Take note of its routing for correct installation of the new belt.
Step 6: Replace the Tensioner and Water Pump
Now is the ideal time to replace the tensioner and, if applicable, the water pump, as these components work closely with the timing belt and can affect its performance.
Step 7: Install the New Timing Belt
Install the new timing belt, ensuring it follows the same path as the old one. Make sure the belt is properly tensioned according to the manufacturer’s specifications.
Step 8: Recheck Timing Marks
Double-check all timing marks to ensure they are still aligned after installing the new belt. A misaligned belt can lead to severe engine damage.
Step 9: Reassemble Components
Reattach any components you removed during the process, such as engine covers and the crankshaft pulley. Ensure everything is secured and torque to the specified values.
Step 10: Reconnect Battery and Test Engine
Reconnect the battery and start the engine. Listen for any unusual noises and check for leaks. Monitor the engine operation to confirm the successful timing belt replacement.
Regular timing belt replacement is essential for your engine’s longevity. Refer to your vehicle’s service manual for specific guidelines and intervals for replacement.
Tools and Parts Needed for a Successful Timing Belt Replacement

Replacing a timing belt is a critical maintenance task that ensures the engine runs smoothly. To perform this task effectively, it is essential to have the right tools and parts ready.
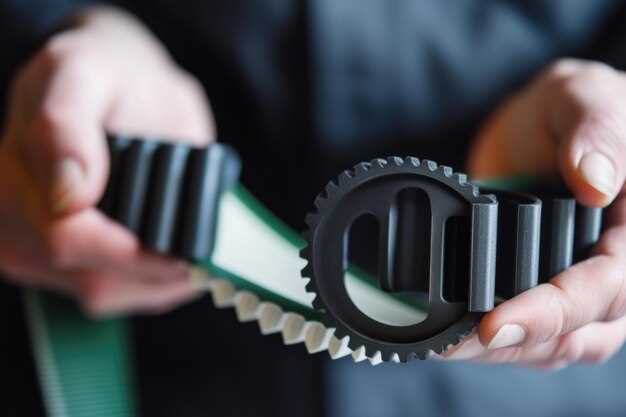
First and foremost, you will need a timing belt replacement kit, which typically includes the new timing belt, idler pulley, and tensioner. These components are crucial for maintaining proper belt tension and ensuring optimal performance.
A socket set and wrenches are necessary to remove the various engine covers and components that obstruct access to the timing belt area. Make sure to have a torque wrench on hand to tighten bolts to the manufacturer’s specifications during reassembly.
In addition to standard tools, a crankshaft and camshaft locking tool can be extremely helpful in maintaining the correct alignment of the engine components while you are replacing the timing belt. This tool ensures that the engine remains in the correct position, preventing potential damage during the process.
Other useful items include a flathead screwdriver for prying off covers and a ratchet strap for holding components in place if necessary. It’s also advisable to have a shop manual specific to your vehicle model. This manual provides detailed instructions and torque specifications essential for a successful replacement.
Don’t forget to have a replacement coolant if the timing belt is located behind the timing cover, as you may need to drain some coolant during the process. Additionally, having a clean workspace and plenty of rags can help you keep everything organized and clean during the replacement.


