


Dealing with a noisy exhaust system can be both frustrating and alarming for vehicle owners. The exhaust system, which includes the muffler, plays a crucial role in reducing engine noise and directing exhaust gases safely away from the vehicle. When this system malfunctions, it not only creates an unpleasant driving experience but can also lead to more severe issues if left unaddressed.
Identifying the source of the noise is the first step in repairing a noisy exhaust system. Common culprits include holes or cracks in the pipes, a worn-out muffler, or loose connections between various exhaust components. Each of these issues can contribute to an increase in noise levels and can significantly affect the performance of your vehicle.
In this guide, we will explore the various aspects of diagnosing and repairing a noisy exhaust system. We will cover essential tools and techniques required for effective repairs, the importance of regular maintenance, and how to ensure that your exhaust system operates as quietly and efficiently as possible. By understanding the underlying problems and applying the correct fixes, you will not only improve your vehicle’s comfort but also enhance its overall functionality.
Identifying the Source of Noise in Your Exhaust System
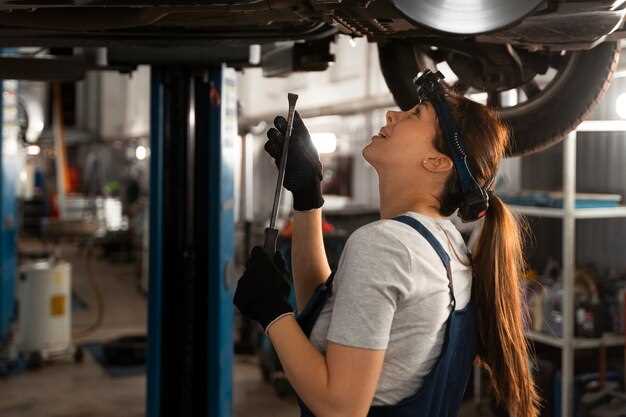
Determining the source of noise in your exhaust system is crucial for effective repair. Start by listening for the type of noise your vehicle produces. A loud rumbling, for instance, might indicate issues with the muffler, while a hissing sound could suggest a leak in the exhaust pipes.
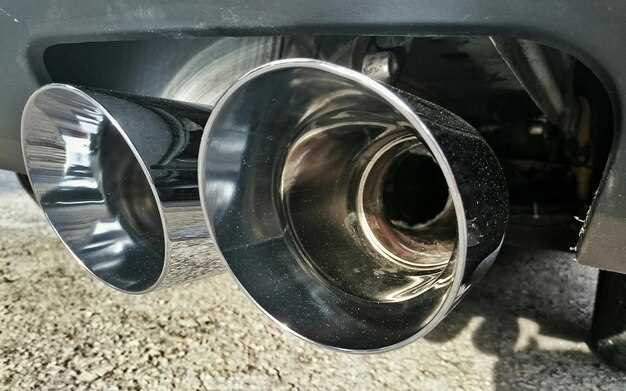
Begin by inspecting the muffler visually. Look for signs of rust, corrosion, or any physical damage. A damaged muffler can amplify sound and reduce performance. If the muffler appears compromised, it may require repair or replacement to eliminate excess noise.
Next, examine the exhaust pipes between the muffler and the engine. Check for any holes or cracks that may cause noise. Tapping the pipes lightly can help assess their integrity; a hollow sound might indicate deterioration. Any leaks found in this area should be addressed promptly to prevent further noise escalation.
Don’t forget to check the exhaust hangers and brackets. Worn or broken hangers can cause the exhaust system to vibrate against the chassis, resulting in unwanted noise. If you notice any damaged hangers, replace them to secure the system properly and minimize sound.
Lastly, perform a test drive. Pay close attention to how the noise varies with changes in acceleration or deceleration. This can help pinpoint whether the issue lies with the muffler or elsewhere in the exhaust system. By systematically identifying these noise sources, you can take the necessary steps to repair your exhaust system effectively.
Step-by-Step Instructions for Muffler Replacement
Replacing a muffler is essential for maintaining the efficiency of your exhaust system and reducing unwanted noise. Follow these steps for a successful repair.
1. Gather Necessary Tools and Materials: Before starting, collect the required tools: a jack, jack stands, wrenches, a saw or cutting tool, and a replacement muffler. A set of safety goggles and gloves is also recommended.
2. Raise the Vehicle: Use the jack to lift the car off the ground and secure it with jack stands. Ensure the vehicle is stable before proceeding to work underneath it.
3. Locate the Muffler: Identify its position within the exhaust system, typically situated between the exhaust pipe and the tailpipe. Inspect for rust or damage, which may guide your replacement choice.
4. Remove the Old Muffler: Use the appropriate wrench to loosen the clamps or bolts securing the muffler. If the muffler is rusted, cutting may be necessary. Carefully detach the old muffler from the exhaust system.
5. Prepare the Area: Clean the exhaust pipe and ensure it is free of debris or rust. A clean surface will facilitate a proper seal with the new muffler.
6. Install the New Muffler: Position the replacement muffler in place, aligning it with the exhaust pipes. Secure it using clamps or bolts, making sure it fits snugly to prevent leaks.
7. Lower the Vehicle: Once the new muffler is securely in place, remove the jack stands and carefully lower the vehicle back to the ground.
8. Test the Exhaust System: Start the engine and listen for any unusual sounds. Inspect for leaks around the new muffler. Ensure the exhaust system operates quietly and efficiently.
By following these steps, you can successfully replace your muffler and enhance the performance of your exhaust system.
Tools and Materials Needed for Exhaust System Repair
To efficiently repair a noisy exhaust system, having the right tools and materials is essential. The following list outlines the necessary items to ensure a successful repair process.
Tools:
1. Jack and Jack Stands: These are crucial for lifting the vehicle to access the exhaust system efficiently. Ensure the jack stands are rated for the weight of your vehicle.
2. Socket Set: A complete set of sockets will help remove exhaust hangers, bolts, and flanges. Make sure to include both metric and standard sizes.
3. Wrenches: Adjustable or combination wrenches are helpful for loosening and tightening fasteners that may be difficult to reach with a socket wrench.
4. Cutting Tools: A reciprocating saw or exhaust pipe cutter is needed for cutting damaged sections of the exhaust pipe to replace them properly.
5. Hammer: This tool can help in loosening rusted components or aligning parts during the installation process.
6. Safety Glasses and Gloves: Protect yourself with safety glasses and gloves to prevent injuries while handling metal and sharp objects.
Materials:
1. Replacement Pipes: If any section of the exhaust system is damaged, having replacement pipes that match your vehicle’s specifications is essential.
2. Exhaust Hangers: New rubber hangers may be required to support the exhaust and prevent vibrations leading to further noise.
3. Exhaust Sealant or Gasket Material: Use high-temperature sealant or gaskets at joints and connections to prevent leaks and reduce noise.
4. Clamps: Various sizes of exhaust clamps are needed to secure the pipes and joints after replacements are made.
5. Anti-Seize Compound: Applying this compound on bolt threads can help prevent seizing and corrosion, making future repairs easier.
Having these tools and materials will streamline the repair process, allowing for a more effective fix to the noisy exhaust system.

