


Maintaining your vehicle’s coolant system is crucial for optimal engine performance and longevity. One of the most essential tasks in upkeep is properly flushing and refilling the coolant, which helps prevent overheating and protects the radiator from corrosion and deposits. Neglecting this service can lead to severe engine problems and costly repairs.
The coolant system, consisting of the radiator, hoses, and the engine block, plays a key role in regulating the engine temperature. Over time, coolant can become contaminated with debris, rust, and other harmful particles. Flushing the system removes these impurities, ensuring that the coolant remains effective at transferring heat away from the engine and maintaining a stable operating temperature.
In this guide, we will discuss the step-by-step process of flushing and refilling your coolant system. From gathering the necessary tools to understanding the right type of coolant for your vehicle, this comprehensive overview will ensure that you can undertake this task confidently and correctly. Keep your engine running smoothly by learning the best practices for maintaining your radiator and coolant system.
Selecting the Right Coolant for Your Vehicle
Choosing the appropriate coolant for your vehicle is crucial for maintaining engine performance and longevity. Coolants differ in formulation, and selecting the right one can prevent overheating, corrosion, and the formation of deposits within the cooling system.
First, consult your vehicle’s owner manual to determine the manufacturer’s specifications for coolant type and mixture. Most vehicles require either ethylene glycol-based or propylene glycol-based coolants. Ethylene glycol is commonly used for its superior heat transfer properties, while propylene glycol is less toxic and often preferred for environmentally friendly applications.
Secondly, pay attention to the color of the coolant. Different colors, such as green, orange, yellow, or blue, indicate various formulations and additives. Using a coolant that matches the original fluid can help avoid chemical reactions that may compromise the system’s integrity.
Additionally, consider the type of additives present in the coolant. Inhibitors and corrosion prevention agents are essential for protecting metal components from rust and degradation. Look for coolants that meet industry standards, such as ASTM D3306 or ASTM D6210, which ensure adequate protection under varying temperatures.
Finally, assess your climate conditions. If you live in an area with extreme temperatures, choose a coolant with a higher freeze point and boiling point to ensure all-season protection. High-quality coolants often come pre-mixed, but if using a concentrate, ensure you dilute it correctly with distilled water to achieve optimal performance.
In summary, selecting the right coolant involves understanding your vehicle’s specific requirements, recognizing coolant types and colors, checking for adequate additives, and considering environmental factors. Taking these steps helps ensure your engine runs smoothly and efficiently.
Step-by-Step Procedure for Flushing the Radiator

Flushing the radiator is essential for maintaining your vehicle’s cooling system. Follow these steps to ensure a thorough and effective flush.
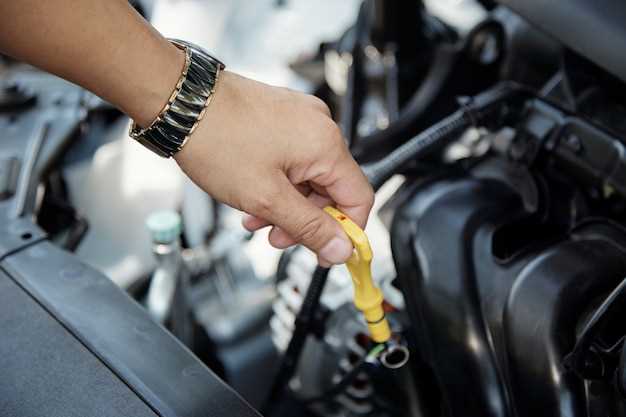
1. Gather Necessary Tools and Materials: You will need a radiator flush solution, a drain pan, a garden hose, a funnel, and safety gloves. Make sure to have a proper coolant to refill the system as well.
2. Prepare the Vehicle: Park the vehicle on a level surface and turn off the engine. Allow the engine to cool completely to avoid burns. Engage the parking brake for safety.
3. Locate the Radiator Drain Plug: Identify the drain plug at the bottom of the radiator. Prepare to collect the old coolant by placing a drain pan underneath the radiator.
4. Drain the Old Coolant: Open the drain plug and let the old coolant flow into the drain pan. Ensure that the coolant is disposed of properly, as it is toxic to pets and the environment.
5. Flush with Water: Once the radiator is empty, close the drain plug. Attach a garden hose to the radiator filler neck and run water through the system. This will help remove any residual coolant and contaminants. Keep flushing until the water runs clear.
6. Add Radiator Flush Solution: After draining the water, pour the radiator flush solution into the radiator. Follow the manufacturer’s instructions regarding the amount to use. Start the engine and let it run for the recommended time, usually around 10-15 minutes, with the heater set to maximum. This allows the solution to circulate through the system.
7. Drain the Flush Solution: After running the engine, turn it off and allow it to cool. Open the drain plug again to remove the radiator flush solution, collecting it in the drain pan. Rinse the radiator with water again to ensure all flush solution is removed.
8. Refill with New Coolant: Close the drain plug once all liquids are drained. Using a funnel, pour the new coolant into the radiator, ensuring to use the recommended mixture and type specified by your vehicle’s manufacturer.
9. Check for Leaks: Start the engine and allow it to reach operating temperature. Check around the radiator and drain plug for any leaks. Look for air bubbles in the coolant reservoir, which may indicate trapped air in the system.
10. Finalize the Process: After ensuring there are no leaks and the system is functioning correctly, securely close the radiator cap. Dispose of the old coolant and flush solution according to local regulations.
By following these steps, you will maintain a clean and efficient radiator, enhancing your vehicle’s cooling system performance.
How to Properly Refill and Bleed the Coolant System
Refilling and bleeding your coolant system is essential for maintaining optimal engine performance and preventing overheating. Follow these steps to ensure your system is properly refilled and air is effectively removed.
-
Gather Necessary Tools and Materials:
- New coolant (make sure it’s compatible with your vehicle)
- Funnel
- Clean cloths
- Coolant reservoir cap
- Thermometer (optional)
-
Check Engine Temperature:
Ensure the engine is cool before beginning. This prevents burns and allows easier coolant handling.
-
Locate the Coolant Reservoir:
Find the coolant reservoir under the hood. It’s typically a translucent plastic tank connected to the radiator.
-
Remove Old Coolant:
If any old coolant is present, properly drain it from the system by removing the drain plug or lower radiator hose.
-
Refill with Coolant:
Using a funnel, slowly pour the new coolant into the reservoir until it reaches the recommended level indicated on the reservoir.
-
Start the Engine:
Start your vehicle and let it idle. This helps circulate the new coolant throughout the system.
-
Bleed the Coolant System:
To remove trapped air, follow these steps:
- Turn the heater on to the maximum setting.
- Monitor the coolant level and add coolant as necessary.
- Look for air bubbles escaping from the reservoir. This indicates air is being purged.
- Once bubbles cease and the coolant level stabilizes, the air has been bled.
-
Check for Leaks:
After the engine has cooled, inspect the coolant system for any signs of leaks. Tighten any loose connections if necessary.
-
Final Check:
Ensure the coolant level is correct after the engine has cooled completely. Make any necessary adjustments.
By following these steps, you will effectively refill and bleed your coolant system, ensuring your engine operates smoothly and efficiently.

